|

TT2 Info | Day 6 | Day 7 | Day 8 | Day 9 | Day 10 | Home | TPSS
|

|
|
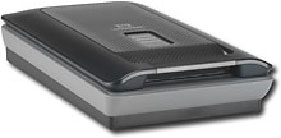
The scanners we will be using for TangiTech2
are Hewlett Packard Scanjet G4050. Different
scanners have different scanning software,
so these step-by-step directions may not
work for your scanner at home or in your
classroom unless it is this model. But once
you learn the basics about scanning, you
will be able to transfer that knowledge to
different scanning programs.

|

|
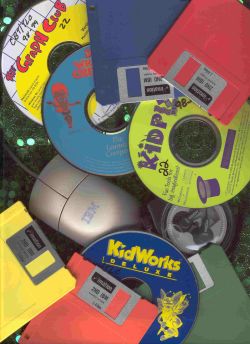
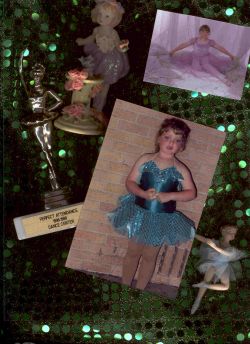
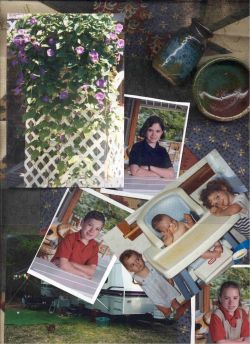
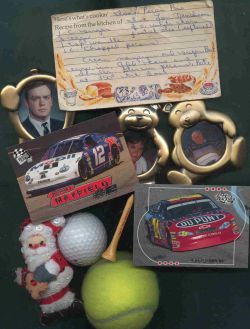
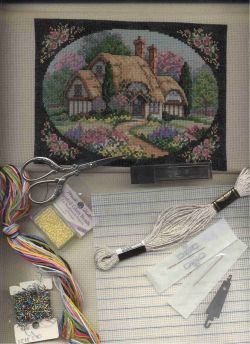
A scanner collage is made by placing items (photographs, realia, etc.) on a computer scanner, scanning the items, and printing the results. A good
scanner collage involves a theme or message. See samples at the bottom of the page. |
Equipment and Supplies
- computer
- Scanner - Consider protecting your scanner's glass stage. Plexiglass or an additional pane of glass can be used to prevent scratches on your scanning surface. Clear transparency film or saran wrap are other alternatives.
- Printer
- Imaging Software - supplements the software that comes with the scanner (such us Paint Shop Pro)
- Paper - recommend Kodak Inkjet Photo Paper (Glossy) 8 1/2 by 11 inches.
- Fabric - different colors and textures
|
Technique
- Assign the Scanner Collage project to your class.
Encourage students to select items that focus on a theme
or a message.
- After each item is placed on
the scanner, cover the
scanner and items with a background cloth. Provide various fabric textures and colors for your students. (Remove the cloth
after each scanning to
prevent overheating.)
- Import the scanned image
into the imaging software,
and perform any desired
changes to the image.
- Print the image on glossy
paper. The image is now ready for framing!
|
Curriculum Connections
- Assign topics in the subject area, such as science, math, or social studies. Scanner collages could illustrate geometric shapes, nations of the world, or elements of the periodic table. Use your imagination.
- Assign an illustrated book report. Students can collect photos and items that would be found in their book.
- Assign a scanner collage autobiography.
|
References & Links
- This information was obtained from a NECC 2000 session
on "Television Production: A Classroom Approach" by Keith Kyker and Christopher Curchy.
- "Scanner as a Camera" UCR/ California Museum of Photography
-
A Few Scanning Tips
-
Snappy Ideas for Using Scanners in
the Classroom
-
Using Scanners in the Classroom
|
|
|
|
|
|
|
|
|
|