Boxing small bits of text or paragraphs - Select the text you want, then click "Format" on the top Menu bar and "Borders and Shading" Boxing small bits of text or paragraphs - Select the text you want, then click "Format" on the top Menu bar and "Borders and Shading"
|
|
|
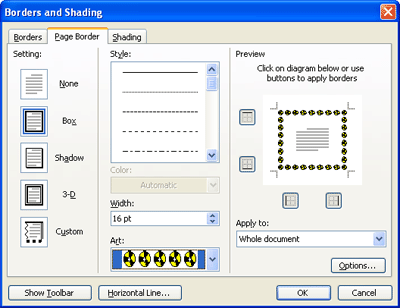
Border Art Around a Page - Click "Format" then "Borders and Shading" and the "Page Border" tab at the top of the dialog box. Go to the bottom under "Art" and click the down-pointing arrow and choose the art border you want. Sometimes Word has a weird thing going on and your border gets cut off at the bottom of the page when you print. To fool the printer into printing everything... follow these steps:
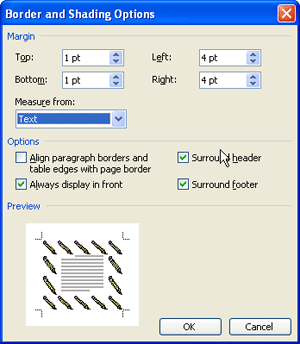
- Click the "Options" button in the bottom right hand corner.
|
|
|
|
|
- Click the down-pointing arrow under "Measure From" and chose "Text" Then click "OK" and "OK."
|
|
Shading Your Text Headings - Click "Format" on the top Menu bar and "Borders and Shading" then click the "Shading" tab. With your text selected, choose the color of Shading you would like and click "OK."
|
|
|
Creating Tables - There are three ways create a table. The first two are the easiest to me.
- Click the Table icon on the Standard Toolbar and click and drag over the squares to create the number of columns and rows.
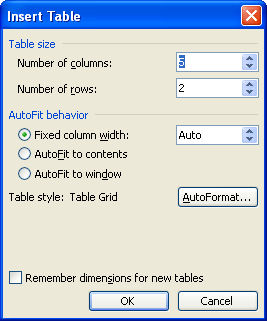
- Click "Table" on the top Menu bar, then "Insert" "Table."
|
|
|
- Choose the number of columns and rows you want in your table. If you want to fancy up your tables, click the "Auto Format" button and choose the style and shading you want.
|
3. You can also create a table by clicking on the  Tables and Borders icon on the Standard Toolbar and use your pencil tool to draw the table to your specs. Tables and Borders icon on the Standard Toolbar and use your pencil tool to draw the table to your specs. |
Table Hints
-
Use the Table toolbar to help tweak your table.
- Use the Tab key to move from cell to cell in a table.
- When you are in the last cell of a table, you can create a new row of tables by hitting the Tab key.
- Shift+Tab moves you backward through the cells of a table.
- You can paste graphics into cells of a table.
- To select an entire row or column, move your mouse directly outside the table in the margin until your mouse turns into a solid black
 arrow pointing to that row/column and click. arrow pointing to that row/column and click.
|
|
|
|
Text Direction - Select the text you want to change and click "Format" on the top Menu bar, then click "Text Direction." Now choose the orientation of your text and click "OK."
|
Messing with a Table
- To move a table, move your cursor in the upper left corner of the table and the " Move Thingy" appears. Just click and drag the "Move Thingy" to move your table within the document.
- To change the size of rows or columns in a table move your mouse over the intersecting lines and you will see

- To erase cell borders within a table, use the eraser tool on the Table and Border toolbar.
|
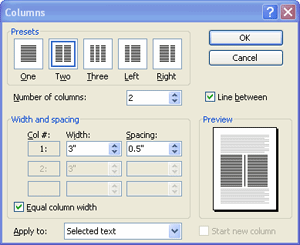
Creating Columns - Click "Format" on the Top menu then "Columns."
- Select the text you want to place in columns and make your choices in the dialog box.
- If you want a line between the columns, click the "Line Between" box.
- Don't use more than two columns on a Portrait document and three on a Landscape document or your eyes will go wiggy.
|
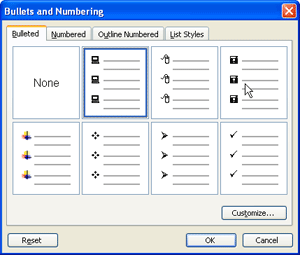
Formatting Bullets - Click "Format" on the top Menu bar and choose 'Bullets and Numbering."
- Click on the tab that says ?Bulleted? then click ?Customize."
- A new dialog box pops up called ?Customize Bulleted List.?
- You have ?Font,? ?Character,? or "Picture" to choose your bullet.
- Click ?Character? and in the font drop-down menu you will find a listing of fonts on your computer.
- Choose the font you wish to explore. The computer and disk bullet can be found in Wingdings Font.
- Webdings also has a good selection for bullets.
- To find a specific bullet, scroll through the symbols and click the one you want.
- Once you have chosen the bullet you would like, click ?OK? and ?OK? again.
- To quickly access the bullets in a document, just click the "Bullet" icon on the Formatting toolbar or the "Numbering" icon.
|
|
|