|
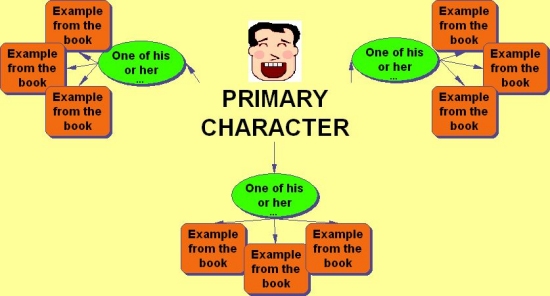
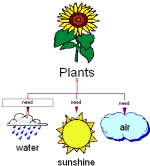
From the Main Idea Symbol, click the Rapidfire Button on the top toolbar and type in a subcategory topic then hit Enter. This will pop out your Subcategory Symbols.

|

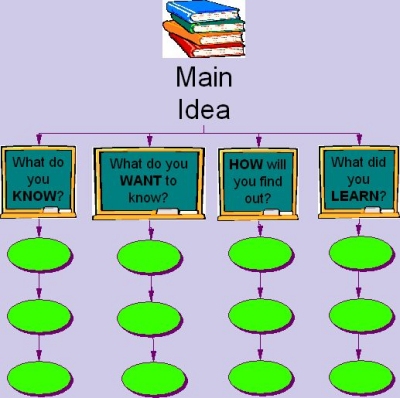
From the Main Idea Symbol you can click the Create then a directional green dot, and you will create subtopic symbols in that direction.
|
|
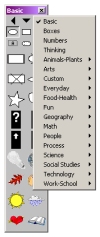
| You can Drag and Drop symbols from the Symbol Palette anywhere you want in the Inspiration window and type in a subtopic label for it. |
You can point and type anywhere in the Inspiration window and the default symbol will automatically appear. |
|
To create hyperlinks in an Inspiration diagram type the URL and hit the Enter key on your keybord. The hyperlink becomes active. If you want just words to become a hyper link follow these steps:
- Highlight the word that you want to become a link.
- Click the Hyperlink button on the top Menu bar.
- In the box that pops up type in the URL hyperlink and click OK.
- You can hyperlink to a webpage, a file, email or new Inspiration document.
|

To insert a graphic from another source as a symbol, click [Edit] on the top Menu bar and then click "Insert Graphic". You can also insert the date by clicking "Edit" then "Paste Date".
|

To move your diagram around in the Inspiration window click on the Position Tool on the bottom toolbar and then click and drag the diagram in the window. Don't forget to click off the Position Tool when you are finished.
|
To resize a symbol click and drag from any of the corner handlebars.
|
Inspiration 6 - - - - Inspiration 7
|
 You can add Notes to an Inspiration symbol by clicking on the symbol and then clicking on the "Add Notes" button on the top toolbar. OR.... by double clicking on the top left hand handlebar surrounding the symbol. When your notes have been added that handlebar will be solid red in version 6 and a note icon in version 7, sending a signal that notes are attached.
|

Click the Spell Check button on the top toolbar and you will be able to help you in the diagram or outline mode.
|

The Zoom feature in the bottom left hand corner of the Inspiration screen allows you to zoom in and out on your diagram. Click on "Big Mountains" to zoom in and "Little Mountains" to zoom out. You can also click on the percent to zoom in and out.
|
| To change existing symbols click on the symbol to get handlebars then click on the new symbol in the Symbol Palette that you want. |
|
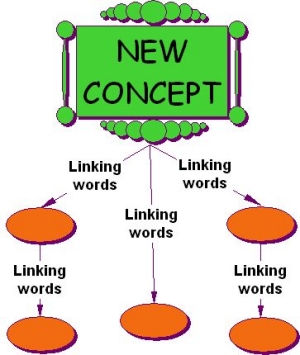
| To establish links between two symbols click on the Link Tool on the top toolbar then click on the first symbol and then the symbol you want to draw the link to. To move the link to a different position on the symbol just click and drag the tip of arrow to a new spot on the symbol.

|
Sometimes you aren't able to get the link in the correct position on the symbol. To give you more choices of spots to connect the link follow these steps:
- Click on "Link" on the top Menu bar
- Now click on "32 link connection points".
- Click "OK".
|
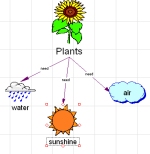
| You can create link text between symbols by clicking on the link then typing in the link text box that pops up. The small black dot at the bottom of the link text box will allow you to click and drag the linktext box anywhere on the connecting link line. |
|
|
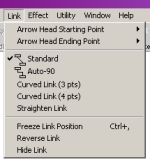
You are able to format the link connectors by clicking on "Link" on the top Menu bar. Here you can chose between standard and auto links and curved or straight links. To make any changes in links you must have clicked on it to select it. |
| To change the color of the background on your Inspiration map click "Effect" on the top Menu bar then click "Background Color" and click the color you want. |
To change the font, color, size, style, or to justify, click "Text" on the top Menu bar and then make your choice. Remember text must be selected before making changes. |
 The Listen Tool is new in Version 7.5. To make the Listen Tool appear on your top toolbar you should click "Utilities" then "Application Properties" to make your choices. In this box, put a checkmark in front of "Listen Tool" and/or "Talking Interface" if your students need these options. The Listen Tool is new in Version 7.5. To make the Listen Tool appear on your top toolbar you should click "Utilities" then "Application Properties" to make your choices. In this box, put a checkmark in front of "Listen Tool" and/or "Talking Interface" if your students need these options. |
The user is able to record their voice in Inspiration 7 by clicking on "Tools" then "Sound" and using a microphone and the sound recorder. Once the sound is saved to that symbol, a small speaker symbol appears in the top right hand corner.
|
|
If you need help lining up the elements of your Inspiration map click "Tools" on the top Menu bar and then click "Grid Settings". Show Grid or Snap to Grid will make your symbols snap in place on the grid lines. If you want more freedom in placement of symbols click to take the checkmark off of "Grid Snap".
|
|

|
 If you want to change the colors of a symbol click on it and then click the Multicolor tool on the Draw toolbar at the bottom of the screen. Now find the color you want to change and point to it and then choose your new color. If you want to change the colors of a symbol click on it and then click the Multicolor tool on the Draw toolbar at the bottom of the screen. Now find the color you want to change and point to it and then choose your new color. |
| You can save your Inspiration map as different kinds of files. On the Menu bar at the top of the screen, click "File" then "Export" and chose the file format you want... gif and jpeg are the two most common. You can even save it in HTML format (webpage). |
To get your Inspiration map to print on one page go to "File]" on the top Menu bar and click "Page Setup" and make sure "Fit to One Page" is checked. This is the default in Version 7. You also have the option of Portrait or Landscape here. |
How to Create Custom Default Settings in...
 Version 6 and Version 7.5...Add your own style to your Inspiration diagrams. If you find yourself making the same changes of color, font, and size over and over, then you need to change the default settings in Inspiration. To customize the default settings follow the steps below: Version 6 and Version 7.5...Add your own style to your Inspiration diagrams. If you find yourself making the same changes of color, font, and size over and over, then you need to change the default settings in Inspiration. To customize the default settings follow the steps below:
- Click "Utility" on the top Menu bar and then click "Default Settings".
- Click "Change" then "Next"
- Now choose the default settings for Symbols, Links, Notes, Outline View, Page Layout, and Printing and click "Next" after you make each choice.
- To save the changes you have made, click "Finish"
- Any new projects that you create from now on will have your customized default settings.
|
|
|